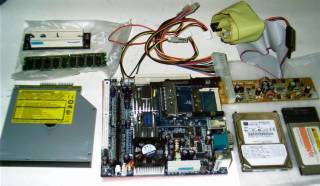
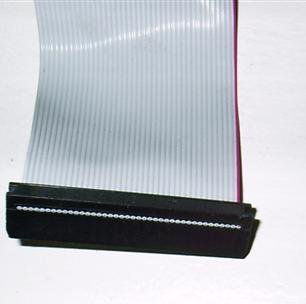
Media Hub

Sunday, August 08, 2004

The Box (inital!)

To start with I didn’t want to buy a standard PC Case, nor did I want to start building the case in the beginning, so I began assembling the computer in one of the cardboard boxes in which some of the equipment came.

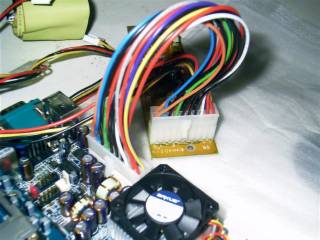
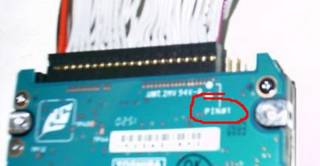
This is where the power connector goes into the motherboard (Note the minute letters spelling out 'PWR')


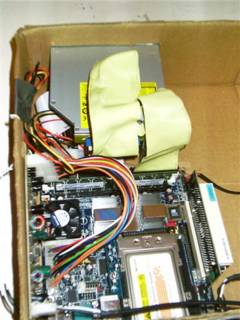
Here’s how it stands today.


Before I flipped the switch, I connected the keyboard, monitor and mouse cables. This is how the back looks (!), before connecting anything.

Note the Wi-fi card! Optimistic!


And the front - (Please no chuckles!!)


Don't miss the power switch (from Radio Shack). By the way, there's two boxes of switches which look entirely identical except for one letter! So, choose the one which has "N.O." in the specifications. It's almost in fine print, so make sure. The power switch should be something that remains 'off' all the time and goes 'on' only for the instant that you press it. Like a doorbell switch basically. The other one available at Radio Shack is the opposite and I had a horrendous night trying to figure out why my PC was switching on and then immediately shutting down. Basically, when the Power Switch is pressed continuously, the PC goes off as it should! So make sure you have the right one.

Next... switching it on. Finally!

Thursday, August 05, 2004

The Connections!

Finally, started to connect together whatever I had bought.

First, the RAM went in. This is pretty straightforward, as there is a small notch on the RAM which aligns with the RAM socket.


Next was the Hard Disk Drive. One of the interesting things that I learnt was that IDE cables has one edge which is coloured red, which I hadn’t noticed. This edge goes into that side which of the IDE socket which says ‘Pin 1’. (I didn’t know this either!) This is to ensure that the correct wires get connected to the correct pins.


The ‘Pin 1’ of the hard drive is also marked.


As is the ‘Pin 1’ of the IDE socket on the motherboard. I realized that this is marked on the underside of the motherboard and not on the side of the socket!

So this is how it looks once connected.


And then the CD / DVD ROM drive. I kept wondering where to connect this, especially since there was a socket on the motherboard which said CD-in. Apparently, this is for something else (to be figured out later, if required!). Finally, after doing some googling, realized that it goes into the second IDE drive socket! That is the one next to where the HDD connects onto the motherboard in the picture above. Another notable point here is that the two IDE connectors on the motherboard are 'Primary' and 'Secondary'. So, if there is only one connection it should go into the 'Primary' IDE connector.

The same idea with the ‘Pin 1’ applies here too!

Besides, the IDE cable, one of the power connectors from the PSU also connects into the CD ROM / DVD drive. Here's how it looks almost connected. I'm just going to be pusing the IDE connector in!


Since this is also a slimline optical drive, I had to connect the laptop IDE drive connector. Just like the HDD, the ‘Pin 1’ of the optical drive is also marked.


Next, came the power supply unit. This connects to the motherboard with the included cable. It took some time to figure out which end of the power cable goes into the PSU and which end into the motherboard. But I figured logically that there would be more connections from the PSU side of things to power the rest of the computer, so that worked!


Sunday, August 01, 2004

Components Bought

To start with, decided and bought the following:

Motherboard : VIA MII (PC card)
Combo CDRW/DVD Drive : Panasonic Slimline
PSU and DC-DC Converter Kit : Morex 60W
RAM : 1 GB PC2100 DDR DIMM
Hard Drive : 60 GB Slim (Laptop) HDD
Remote Control : X10 RF Remote (similar to ATI All-in-Wonder Remote)

Slimline CD to Desktop IDE Adapter (To connect the slimline CD / DVD player)
2.5in to 3.5in IDE Cable (This is required because I have a laptop hard drive)
Zalman FAN MATE 1 fan speed controller (To reduce fan noise)


From left, the CD / DVD drive, the motherboard, Hard Disk Drive and the Wi-fi connector. On top, the RAM and the dual Riser card (since the Epia M II has only one PCI slot), the IDE cables, and just below them the Power Supply Unit without the power brick.

Decided to spend the most on RAM, as that is one thing that I wouldn't want to waste time (and money!) later upgrading. The Hard Drive I had already, from when a laptop hard drive became too small for everything.

I've always loved a slot loading CD / DVD drive, so went in for that. And the remote I had also bought earlier to control music on my current dekstop.

The Morex 60W Power Supply Unit is coupled with a Universal Voltage brick, so I can use it anywhere. Also, since both the hard drive and CD / DVD drive are slimline, they need less power, so decided against a more powerful power unit.

Sunday, July 25, 2004

The Beginning

All those computer projects made me think that I could do something as well. So that’s where it all began.

The idea was to create a TiVo and SliMP3 in one. And since I have a Tivoli sound system, I thought it would be a good idea to have it’s looks integrated as well.

The design goals are:
1. A box which looks small and nice enough to put on a shelf without looking geeky. I'm trying to aim for it to be 6" high, 11" wide and maybe 10" deep. Maybe I’ll be able to shrink it later.

2. No monitor, keyboard or mouse. All controls either through the integrated knob or the remote control. (I managed to get an RF remote at eBay, which works through walls, so line of sight is not required!)

2. Only display is through a front LCD panel like you have on general audio systems. Controlling through a TV screen is a strict no-no while listening to music!

3. Record and time-shift TV programs.

4. Broadcast music over internet radio (I do this occasionally nowadays, although you might hear only old hindi songs!)

5. Lastly, and this might be optional, broadcast music over an FM transmitter, for a range of maybe 50 to a 100 ft, so that I can tune any normal transistor radio to listen to music playing from home.

After doing a lot of research, starting from Operating System, to motherboards, to trying to figure out if the OS should be embedded or not, came to the conclusion that since this is the first time I’m delving into the innards of a computer AND trying to create something useful, let me stay with the stuff I’m familiar with. I can always integrate change things like the OS later.

Embedded systems were discarded right up front, because I just don’t know enough about them.

So finally, decided to have a Windows XP system, with the necessary software.